Showing posts with label crafts. Show all posts

Friday, August 7, 2020

Quick Tip: Ink Blender Storage Solution


Hello friends! Today I have something a bit different for you. I'm sharing my new storage solution for my Mini Ink Blending Tools and Blending Foams for my Distress Oxide Inks.

This solution cost me a whopping $6 + tax, so it's super affordable too. I used a Jewelry Bead Organizer from Hobby Lobby, and labeled all the spots using my Brother P-touch Label Maker.

This is really something that is much easier to show you in a video format, so I hope you'll watch and enjoy! Thank you so much for stopping by today!

Thursday, April 21, 2016

Made For You - Newton's Nook April Release Day 2


Good morning friends! I'm back again with day 2 of guest designing with Newton's Nook for their April release! Today we are introducing the Tag Sampler stamp set, which coordinates perfectly with their Tags Times Two Die Set.

I know many of us are crafters in other ways besides card making, whether it be knitting, crocheting, baking, etc, and this set is just perfect for all those handmade gifts! Christmas, birthdays, teacher gifts, whatever the occasion, the Tag Sampler has got you covered.


I stamped out my tag and sentiment in different colors and then die cut it out and layered it over an additional die cut tag for a pop of color and fun. I added some natural button twine, and tied it on to a cute container full of fresh baked chocolate chip cookies, and viola! An instant, adorable gift that anyone would be crazy not to love!

Would you like to win the Tag Sampler Stamp Set?
This set will be given away to ONE lucky winner! 

Here's how to win: 
Comment on the NND blog and Design Team blogs (see list below)! The winner will be chosen at random from the collective blog release posts. Make sure to check out each of their blogs and comment for your chance to win. You will not know which blog has been chosen so the more you comment on the better your chances are of winning! You have until Thursday, April 21st at 9pm CST to comment  -- winners will be announced on the blog post on Friday, April 22nd. Note: If you have already ordered this stamp set and you win, you may replace it with any in stock item of equal value. 

Check out all the awesome Design Team Blogs below to enter:


Thanks for stopping by today! I hope you enjoyed the Newton's Nook April release as much as I did!


Tuesday, April 23, 2013

Crafter's Companion Butterfly Mixed-Media Tutorial


Hey there, everybody!
I'm bringing something a little different to y'all today.
I've got a tutorial on Butterfly Mixed-Media Project
featuring stamps by Crafter's Companion.


The stamps I used on my project are:
but there are lots of awesome CC stamps 
that would work great for mixed-media.

I hope you'll check them out!

Enjoy the video!
And let me know if you'd like to see more projects like this!

Thursday, April 18, 2013

Mixed-Media Canvas Share, Questions, and a Haul


Hey everyone!
I wanted to pop in and share my latest YouTube video.
In it I share a mixed-media canvas I've been working on,
ask a few questions about upcoming videos and projects,
and share a small haul from Crafter's Companion.

A look at the canvas:


And the video:


Thanks so much for visiting!

Friday, October 12, 2012

DIY Two-Tiered Serving Tray


Hey everybody!
I've got a fun, easy, and inexpensive
crafty project to share with you girls today.

I recently made this two-tiered serving tray
to store my Mister Huey's, Glimmer Mists,
Paint Daubers, Stickles, and such in my craft room.


This two-tiered tray is so versatile!
You could use it as a home decor piece and fill it
with leaves and mini pumpkins for fall,
and change it out with each season.
You could use it as a serving tray at a party --
just put the food in paper liners or little cups
as the spray paint might not be food safe.
You could use it to store all sorts of office supplies,
embellishments like vials of glitter or glass jars of buttons.
So many possibilities.

I filmed a how-to video so you can make your own!
If you do, be sure to let me know
so I can come check it out. :o)

Watch here or click the bottom right YouTube
icon to view in HD.

Friday, September 21, 2012

Your Love Gives Us Wings Altered Art Canvas


Happy Friday, everyone!
Today is my dad's birthday, and in honor of that, 
I wanted to share a project I made for him a while back.
Actually, for Father's Day.
I never got a chance to share it before the burglary,
and after it, I lost all the pictures I had uploaded onto my MacBook.
For some reason, I thought I'd taken the photos of it
with my camera, which was also stolen, but I recently
found them on my iPhone. Yay! :o)

This was an altered art canvas I made using book text
(which happened to be about bees, so what shows through
all coincides with the project),
I also stamped, doodled, painted, stenciled, and just had
lots of crazy, messy fun with it.

The bees were made using the fingerprints of my
husband, children and I, and our names are handwritten
beneath them for an added touch of whimsy.
Also, scrawled all along the sides (not pictured) 
are words that remind each of us of my dad.


Happy Birthday, Dad!

Hope you enjoyed it!

Tuesday, September 18, 2012

Papertrey Ink Haul


Hey girls!
Got a quick haul video for ya today.
I have been desperately needing some new
ink colors for MONTHS, and I kept going back
and forth between the Momento Dew Drops and the
Papertrey Ink Premium Dye Cubes and finally 
decided to go with Papertrey because they were cheaper. :o)

Plus I've heard good things about their inks.

I also had been NEEDING a German sentiment set 
for YEARS (seriously, YEARS! ;o) to use
when making cards for my husband's family back in Germany.

I picked up a few other things I'd been really wanting,
and also a little basket from Goodwill for storing my inks --
I altered it with spray paint -- stay tuned to the end 
of the video and I'll show you a couple after shots.

Enjoy!

Thursday, September 6, 2012

Halloween Deco Mesh Designs


Hey everyone!
I've been making a lot more deco mesh designs
at work, and I thought I'd share a few of them here.

We're getting ready for Halloween, 
so here's a sweet witchy wreath I made
using tri-colored deco mesh, ribbons, spiders,
a plush witch, and sparkly black curly willow.


We ran out of orange deco mesh for a few days,
so I was trying to come up with something using the white.
I ended up with this cute mummy that got a LOT 
of compliments and how-to requests!


Since the mummy went over so well,
I came up with the idea to try a Frankenstein.
I'm still trying to come up with something to use
for the bolts in his neck, but I ran out of time,
so I'll have to finish him up on Saturday.


I know this isn't my typical type of project 
to share here, but I hope you enjoyed them anyway!

Have a great day!

Thursday, August 23, 2012

Sour Cream Container Teacher Gifts


Good morning!
Today is my kids first day of school!
I'm just as excited as they are.
I loved having them home all summer,
but just like last year, I never got so much as an hour
to relax all by myself.

Back-to-school time brings with it a slightly different 
hectic schedule, but between school drop off times and work, 
I have about an hour to myself every morning.
I take a book to Tim Hortons, grab myself a mocha 
and a muffin, and have some ME TIME.
*happy sigh*

Can't wait.

Anyway, I thought I'd share a video tutorial
on how I made my teacher gifts this year. 
They're super quick, easy, and inexpensive --
I made the whole lot of six gifts for $5!
Plus, the sour cream containers are so easily customizable
for party favors, stocking stuffers, and any other kind
of holiday gift or treat you can think of.


I hope I inspire you to make some of your own.
Enjoy!


Tuesday, August 21, 2012

My First Deco Mesh Wreath


Hey there! 
I just wanted to pop in and share a fun story with you all.
I think you all know by now that I work as a
floral designer in a local craft store.

I've made hundreds of wreaths in the last two years, 
but Sunday night I decided to try making my first deco mesh wreath.

Before I was even halfway done, I got called away from my station
and while I was gone a lady passed by and saw it. 
She spotted my co-worker Melina and asked her who was making it.
Then she tracked me down at the other end of the store!

She said, "Don't you DARE sell that wreath!
It's so beautiful! I NEED it! It's exactly what I've been looking for!"
Talk about a confidence boost! :o)

But keep in mind that at that point, I only had the green deco mesh,
the pumpkin print ribbon, and the inner layer of gold ribbon on it.
So I was still pretty nervous, hoping she would still be so 
enthusiastic about it when it was all done.


I finished too near to closing time for her to pick it up that night,
so I worried about it all day Monday on my day off.
This morning, I made a beeline for the back of the store
where we keep the special orders that are waiting to be picked up,
and was so pleased and relieved to discover it was gone!

She had picked it up the night before!
Yay, me! :o)

Can't wait to make another!

Wednesday, August 8, 2012

Customized iPhone Case

Hey all!
I just wanted to share a video I filmed recently
on how to make and customize your own iPhone cases.
It's totally simple and you can do a million different looks.

It's being featured as a Fresh Cuts video tutorial
over at the Lawnscaping Challenge blog today as well.

Enjoy!

Monday, July 16, 2012

Lawnscaping Challenge #38 & Giveaway


Hey, there everybody!


Isn't that photo just a hodge podge of goodness?
There are just so many ways you could go with it!


Our challenge is sponsored by the wonderful,
delightful, whimsical Lawn Fawn who has generously
offered up the following prize:


And with TEN new sets releasing this week at CHA,
who wouldn't love that, am I right?

For my project, I decided to make a paper bag mini album.
Here's a look at the front:


The inside is pretty intereactive,
with pockets, tabs, and tags that slide out,
so rather than take a whole bunch of pictures that wouldn't
do it justice, I decided to film a video.

My iPhone was the only thing I had on me
when our house was broken into, so I was able to film
with that and upload directly to YouTube.
I hope you'll forgive the lack of an introduction or credits.
Please watch all the way to the end though,
I promise it's worth it. :o)

You can click on the YouTube icon at the bottom right
to watch it there in HD and please also subscribe to my channel.
I'm hoping to film lots more video tutorials
once I replace my camera and Macbook.


Thank you so much for stopping by!
Please head over to the Lawnscaping Challenge blog
to see the other incredible design team's projects
and find out all the details on how to enter our challenge

Have a fantastic day!

Monday, June 18, 2012

Lawnscaping Challenge #36


Hello there! Welcome to Lawnscaping Challenge #36!


Our challenge is sponsored by the wonderful,
whimsical, and witty Lawn Fawn!


They have generously donated a FREE stamp set to our glorious winner.
And just in time for Inspiration Week over on their blog!
Be sure to check it out and enter for the chance to win even more prizes!


On to my project for the Color Splash challenge.
I decided to go with gray, white, and a bit of vintage text paper
for my neutrals, with robin's egg blue for my "splash."

I was doing my planting in my container garden,
and ran out of space for this little guy.
So I decided it would be fun to make him a pretty little
home of his own, and painted a terra cotta pot,
altered a clothespin, and stamped a tag with
so I wouldn't forget his name. Lol.
I guess it should be a HER, since her name is Rosemary. ;o)
Anyway, I wouldn't forget -- she smells wonderful!
But all the same, now she has a happy little place of residence.


Hope you enjoyed it!

Please stop by the Lawnscaping Challenge blog
to see all the other amazing Designer creations,
and say hello to our three newest Design Team members
who were revealed on the blog yesterday.
I am so excited to work with these phenomenally talented ladies!

Have an amazing day, everybody!
Happy crafting!

Monday, June 4, 2012

Lawnscaping Challenge #35 (Video Tutorial)


Before I jump in with this week's Lawnscaping Challenge,
I just wanted to give you guys a quick update.
My last post was actually scheduled since I was out of town,
so the last time I actually spoke with you all "in person"
was THIS POST where I shared the six piece card set I'd made
for the writer's conference I was heading to later that day.

Well, I'm back, obviously, ;o) and I had THE BEST time!
It was everything I'd hoped it would be and more.
I got to hang out with fabulous people,
stay in a gorgeous hotel with an incredible shower,
I learned so much about the craft that I am so passionate about,
I freaking WON third place in the Short Story contest
which was judged by industry professionals,
I placed sixth in the contest with the other short story I entered,
I won a "great-opening-lines" game played with my peers,
and most importantly, I came home with the self-confidence
that I've always been sorely lacking.

It was an amazing, amazing weekend, and I can't wait
for next year's conference!

So now, jumping right into the reason you're here:
Welcome to Lawnscaping Challenge #35!


Our challenge is generously sponsored by the
incredible Simon Says Stamp!

Simon Says Stamp


Since I've been home, I've been enjoying testing my wings,
trying new things, in particular, mixed-media.
I decided to alter a canvas for my design team project.


papers from My Mind's Eye Lost & Found collection.


And, I even found time to film a tutorial,
which is a part of our new Lawnscaping Fresh Cuts video series.
I hope you enjoy it!
Watch here or on YouTube.
And please don't forget to rate and subscribe
and leave a comment if you enjoyed it. :o)


Thank you all so much for stopping by today.
Please head over to the Lawnscaping Challenge blog
to see the other amazing design team samples
and to get all the details on how to enter our challenge.

Have an awesome day!

Sunday, May 13, 2012

Love Helps Us Grow Canvas


Happy Mother's Day!

I know you're all very busy eating breakfast in bed
and being completely pampered, right? ;o)
I hope so!
So I'll keep this short.

I wanted to share the gift I made for my step-mom.

I've been obsessively watching mixed-media on canvas
videos on YouTube for a few weeks now, 
and finally decided to take the plunge and try it myself.


Click on the photo to see all the details.
There's lots!

For this project I used a 10''x10'' deep-edge canvas
and added layers of book paper, acrylic paint, stamps in StazOn ink, 
Faber Castel markers, and black gel pen.

I had each member of my family finger paint a blossom
which I then turned into a flower.
Then we each thought of at least one word to describe 
my step-mother, and wrote those on the front, 
and along all four edges of the canvas.

I really hope she loves it!
And I hope each of you have a wonderful Mother's Day!
Thanks for stopping by.


Friday, February 10, 2012

Floral Designs


Hey everybody!
Thought I'd do something a little different today.

I think most of you know that I work as a
Floral Designer at my local A. C. Moore.
Last January when I got the position, 
I shared a few of my (sad) first attempts with you,
but I haven't shared any of my arrangements since then.

Last Saturday evening, after I punched out,
I walked around and took a some photos of a couple
of my designs that I could reach. ;o)
What can I say? I'm short. And a lot of them are high up.

Anyway, I thought maybe y'all would 
be interested to see them.
Prices are always reflected on the actual cost of product used.
A few of these are large "show piece" arrangements,
others are smaller and more reasonably priced. :o)

Enjoy!


I'll tell you what, it's a great feeling to get to go to work
and be creative every day.

I'd love any comments!

Thanks so much for stopping by!

Monday, December 5, 2011

Lawnscaping Challenge #23 + bonus video


Hey there!


This challenge is brought to you by the wonderful


who has generously offered up this fabulous prize:


This round our challenge is all about making
tags or treat bags, which are both perfect for the
holiday gift-giving season.

Here's mine:


I made this cute little mini treat bag
out of -- are you ready for it?
A regular standard-size card envelope!

And it was so easy to do,
I knew I had to share the process,
so I filmed a little how-to video for y'all.
Filled with candy or cookies, these mini treat bags
would be perfect to have on hand for all the little
goodies you need to hand out this holiday season --
teachers, the mailman, the babysitter, kid's classmates,
just about anyone on your gift list.

Anyway, I hope you enjoy it!
(Click the far bottom right to watch in HD on YouTube)


Please also stop by the rest of the design team's 
blogs and leave them some comment love 
on their wonderful creations.
and our amazingly talented guest designers:

And don't forget to hop over to the 
for all the details on how to enter.

Have a great day, everybody!


Monday, May 16, 2011

Lawnscaping Challenge #10

Hello there!
Can you believe our 10th challenge is already here?
And, gosh, it's a fun one!
I mean, who doesn't love polka dots, right?
Check it out:


And we have a very special sponsor for you.
Mold Muse has generously donated a $25 gift certificate
to their fantastic Etsy shop for the winner.


If you aren't familiar with Mold Muse, they make
 silicone molds for use with polymer clay and resin.
Kelly Marie Alvarez has two video tutorials here and here,
and Laurel Beard has two here and here.
The molds are fun and easy to use, so be sure to check those out.

Also, the winner of Lawnscaping Challenge #10
will receive a guest designer spot on a future challenge!


Okay, so for my card,
I decided to turn my molded clay flowers into earrings,
and then use them to embellish the front of the card.
This was a super simple project,
and it turned out adorable, don't you think?


To make room for the earring studs behind the panel,
I added 3 layers of dimensional adhesive squares to the 4 corners.

I also wanted to mention that my sentiment came from
Lawn Fawn's Bows & Holly set.
That's what I love so much about Lawn Fawn stamps.
They're so versatile, that even a Christmas set
works perfectly for every day use.
Did you know that Lawn Fawn is also sneak peeking
NINE new sets at their blog this week? Yay!

Speaking of things you don't want to miss,
how about the other design team member's fabulous samples!
and our lovely guest designer

And of course, you'll want to visit the
Lawnscaping Challenge blog for all the details on how to enter.

Have a fantastic week, everybody!

Supplies:
cardstock: Bazzill
patterned paper: My Mind's Eye, DCWV
stamps: Lawn Fawn "Bannerific", and "Bows & Holly"
molds: Mold Muse
clay: Sculpey
ribbon: Pure Color
twine: My Mind's Eye

Friday, January 14, 2011

Branching Out -- New Job Title


So two weeks ago I had some exciting news
to share when I was chosen to be one of the
Lawnscaping Design Team members.
This week I have some more exciting news
to share -- this time pertaining to my job.

I think most of you know that I work at
an arts and crafts chain store.
Well, awhile back (long story) we found
ourselves without a floral designer.
Then just before Christmas
a lady came in with a special order.
There was no one who was qualified to do it,
but I guess since I have a reputation
for being crafty they asked me to try.

So with fear and trepidation,
and zero training or experience
I put together my first floral arrangement.
And to my surprise, the lady LOVED it.
Raved about it.

So the next week when another customer
came in wanting another arrangement,
I was again assigned the task.
And the lady LOVED it.
One of my bosses called me especially
on her day off, just to tell me how thrilled
the customer was.

So when I came back from Germany,
my bosses met with me and gave me a new job title:
Floral Designer.
They know I'm new at this.
They know I'm learning on the fly here.
But they're willing to let me test my wings.
It's scary and exciting and I couldn't be more thrilled.

I remembered to bring my camera
this week, to snap a pic to share
of one of my first-week-as-floral-designer
floral arrangements.


And a close up.


A lot of what I used here, I recycled.
The white hydrangeas were from the Christmas tree
we decorated, the peach roses were from
a broken pot of flowers.
Then I just added a few stems that I thought
looked pretty.

I know I have so much to learn.
But isn't it exciting? :o)

Thursday, January 13, 2011

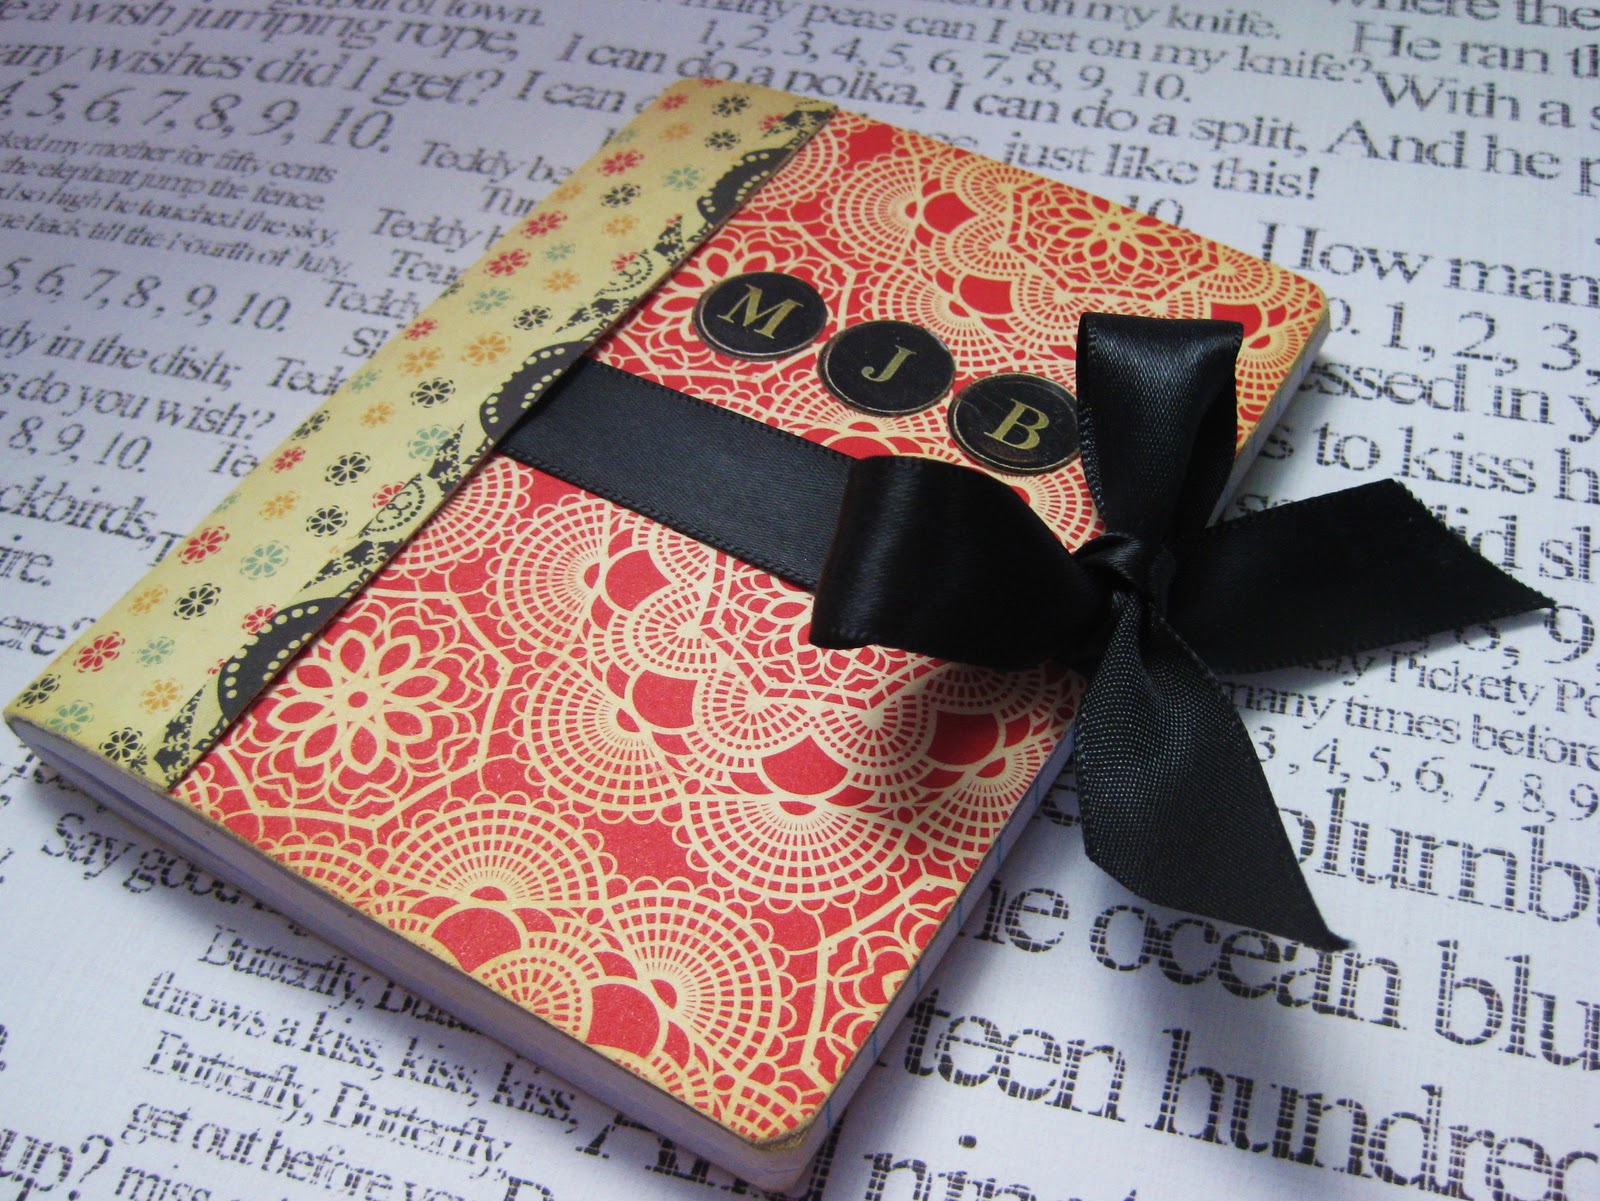
Altered Mini Composition


Good morning!
I wanted to pop in real quick before work
and share with you an altered mini composition
notebook I made the other night for my step-mom.

They're travelling to Israel in March
so I thought a pocket-sized notebook like this
might make a good travel journal.

These are really easy to whip up.
And at $.97 plus paper and ribbon scraps
they're really inexpensive, too.
I make them for my kids all the time.


If anyone's interested, maybe I can do
a how-to post. Let me know if that's something
you would like. :o)

Have a great day!


Supplies:
mini composition notebook (purchased at WalMart for $.97)
patterned paper: October Afternoon, Cosmo Cricket
ribbon: Offray
alpha stickers: Nostalgique

LinkWithin

Related Posts Plugin for WordPress, Blogger...