Monday, July 29, 2024

Bring on the Sun Card


Hey friends, today I've got another fun card to share using products from the brand new Sun, Sand, and Surf Card Kits from Hello Bluebird. This one features Jungle Littles at the Beach, which is part of the Classic Kit, which as of when I'm typing this, still has a few in stock. The Expanded Kit sold out in less than 24 hours! I wanted to bring you some happy, Summertime inspiration, so I colored the images with Copic markers to match some patterned paper, and trimmed them out with the matching dies.


For my background, I took a piece of Bristol Cardstock and masked off the horizon line with Post-it Tape. Then I blended on Salvaged Patina Distress Oxide Ink for the sky, Peacock Feathers and Uncharted Mariner for the sea, and Antique Linen and Gathered Twigs for the sand. I stamped the sentiment in the center and then die cut the Hello Bluebird Gallery Frame #3 from the Echo Park My Little Girl 6x6 patterned paper and popped the frame over the background with foam tape.


I adhered that to a Lilac card base and stamped on the inside in Juice Box Ink. Then I just popped the cute little critters into the open windows with more foam tape and finished them off with a bit of Stardust Stickles. If you'd like to see how the whole thing came together, you can watch the video tutorial HERE on my YouTube channel, or click below. Thanks so much! I really hope you enjoy it!

Saturday, July 27, 2024

Island Vibes Card - Lawn Fawn Feature


 Hey friends, today I'm so happy to be featured over on the Lawn Fawn blog and YouTube channel with a Summertime collage card using so many iconic images from a bunch of different stamp sets, including Life is GoodSmooth SailingOn the Beach, and Mermaid for You along with a sentiment from Magic Messages. I'll have all other supplies and details in my post over there so I hope you'll check that out. If you'd like to see how the card came together, you can find the video tutorial HERE. Thanks so much for watching! Have a great day!

Friday, July 26, 2024

Underwater Holiday Card - Lawn Fawnatics Feature


 Hey friends, today I'm over on the Lawn Fawnatics blog with another card for our Christmas in July Challenge! I have such a hard time making Christmas cards in the middle of summer, unless I set them in a warm or tropical location -- then it's easy peasy! Since the last one I did was set in the desert, this time I went under the sea, combining images from Mermaid for YouLife is Good, and Christmas Fishes with the Desert Canyon Backdrop. I'll have all other details and supplies listed in my post over there, so I hope you'll check it out. If you'd like to see how the card came together, you can find the video tutorial HERE on my YouTube channel. Thanks so much for watching! Have a great day!

Thursday, July 25, 2024

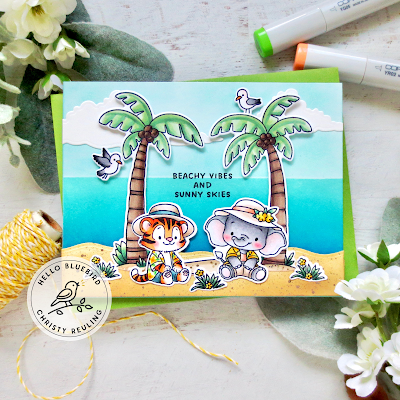
Beachy Vibes Card - Hello Bluebird Feature


Hey friends, today I'm so happy to be featured over on the Hello Bluebird blog with a fun card using products from the fun, new Sun, Sand, and Surf Card Kits for July 2024. These kits are absolutely full of Summertime fun and I could not love them more! I'll have all the details in my post over there, so I hope you'll go check it out. No video for this one, since I created it late at night, but I do have an Overview of the Entire Hello Bluebird Kit Release on my YouTube channel, as well as two other card videos already using these products. Check out the card using Kit 1 HERE and the card using Kit 2 HERE. Thanks so much for stopping by!


Tuesday, July 23, 2024

Hello Summer Card - Hello Bluebird Sneak Peek


Hey friends, I'm back with another sneak peek at some of the products from the Hello Bluebird Sun, Sand, and Surf Kits. If you missed my previous sneak peek card, you can find the blog post HERE and the video tutorial HERE. Today's card is using the adorable turtle and accessories from the Beach Friends stamp set, which I've colored with Copic markers and trimmed out with the matching dies.


I wanted my background to look as though the sentiment had been carved into the sand, and the waves were coming to wash it away, so I created the sand section by blending Antique Linen and Gathered Twigs Distress Oxide Inks onto a panel of Bristol Cardstock. Then I cut down the waves using the new Beach Builder dies, and blended on Salvaged Patina, Peacock Feathers, and Uncharted Mariner. I used the Hello Summer die to inlay the sentiment.


All of the products I used today are available in tonight's 7/23 release at 7pm MDT (9pm EST). Quantities are limited and will not be restocked, so if you want to get your hands on this Summertime goodness, don't hesitate! If you'd like to see the video tutorial of how this card came together, you can find it HERE on my YouTube channel. Thanks so much for stopping by!

Monday, July 22, 2024

Surf's Up Square Card - Hello Bluebird Sneak Peek

Hey friends, today I'm here with a project that is a sneak peek of tomorrow's Hello Bluebird July Kit Release. The Sun, Sand, and Surf kit is absolutely full of Summertime fun! And there is so much packed into each kit. The amount of cards you'll be able to create is just endless.

For this card I featured the Gone Surfin' stamp set. Aren't these surfer dudes just so cute? I already sent this card to my son who just moved to Los Angeles two weeks ago. What could be more perfect? I colored these images with Copic markers and trimmed them out with their matching dies.

For the background, I featured the Big Wave Scene die, which is so much fun to play with! Spoiler alert, you'll see another card from me using this die soon. I cut it out of a few colors of cardstock and added embellishments with Copics. And to create a nice, bold sentiment, I used the Hello Summer die. All of these products (and more!) are included in Kit #2. To see them in action, you can find the video tutorial for this card HERE on my YouTube channel. Quantities of these kits are limited and will not be restocked, so get it while you can! They go live on 7/23 at 7pm MDT (9pm EST). Happy shopping!

Eight Ways to Color Mice


 Hey friends, today I've got another critter coloring video. I've been doing these about once a month for a while now and you guys seem to really enjoy them! So far I've done gorillas, elephants, red foxes, cats, dogs, and the newest edition is mice! So I'm showing you eight ways to color mice with different Copic combos, including a couple with different patterns. All of these can be modified for whatever coloring medium you use, and I hope it gives you some new ideas. You can find the video tutorial HERE on my YouTube channel. Thanks so much for watching! Have a lovely day!

Friday, July 19, 2024

Reading Rainbow Card


Hey friends, I'm back today with a Reading Rainbow inspired card using the adorable Mama Elephant Book Worm stamp set. I've been wanting to ink up this set for so long! I stamped the images in Lawn Fawn Jet Black Ink, colored them with Copic markers to match the Echo Park My Little Girl 6x6 pad, and trimmed them out with the matching dies.


For the background, I trimmed out a white panel with the Lawn Fawn Small Stitched Rectangle Stackables and blended on some Salvaged Patina Distress Oxide Ink. I stamped a sentiment in the top right corner and popped that up with foam tape over two of the patterned papers and adhered my images with liquid glue. I embellished the card with some tiny hearts die cut from the Lawn Fawn Hearts and Stars Skinny Tag and a bit of Stardust Stickles.


If you'd like to see how this card came together, you can check out the video tutorial HERE on my YouTube channel Christy Gets Crafty. I really hope that you enjoy it! Thanks so much for stopping by!

Monday, July 15, 2024

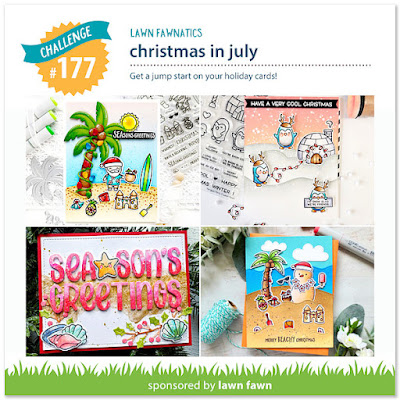
Christmas in the Desert Card - Lawn Fawnatics #177


Hey friends, it's time for another Lawn Fawnatics Challenge, and this time we are celebrating Christmas in July! For my card I wanted to to take the holidays to the desert, so I featured the super adorable Critters in the Desert stamp set, combined with images from Penguin PartyUgly and BrightMerry MiceSay What? Holiday Pets, and Holiday Party Animal. I colored them all with Copic markers and trimmed them out with the matching dies.


For my focal panel, I started with the Desert Canyon Backdrop and trimmed it out of Bristol Cardstock. Then I blended on Distress Oxide Inks in Antique LinenGathered TwigsVintage Photo, and Black Soot. I created the sky on a separate panel, using Salvaged PatinaUncharted Mariner, and more Black Soot. I did some splatter with water and white acrylic paint to make the stars and white heat embossed my sentiment at the top.


I glued the background to a Mermaid card base and added my images over top with some liquid glue. Then I finished off by adding a bit of sparkle with some Stardust Stickles. If you'd like to see how the card came together, you can check out the video tutorial HERE on my YouTube channel. Also, don't forget to stop by the Lawn Fawnatics challenge blog to see what the rest of the design team has created and to link up your own projects and play along. Thanks so much for stopping by!


Friday, July 12, 2024

Mice Day to Celebrate Card Duo


 Hey friends, today I'm bringing you TWO cards, which we came up with in my previous Plan 2 Cards with Me Video. Today we are putting those plans into action and creating cards using the adorable BB Mice Day to Celebrate by MFT stamp set. These little mice are just so cute and make the perfect birthday cards. I colored them all with Copics and trimmed them out with the matching dies.


For the focal panels, I trimmed down white cardstock with the MFT Stitched Rectangle STAX Set 2, and blended a little Salvaged Patina Distress Oxide Ink in the center, then stamped a sentiment at the bottom. I layered patterned paper on the card fronts and popped the focal panels up with foam tape, then finished with some Stardust Stickles.


If you'd like to see how the cards came together, you can check out the video tutorial HERE on my YouTube channel. Thank you so much for watching! Enjoy!

Monday, July 8, 2024

Plan 2 Cards with Me - Mice Day to Celebrate


 Hey friends! Today I'm back with my monthly Plan a Card with Me Series, where I take you behind the scenes and show you what goes on in my brain as I'm coming up with a card concept. This month I'm creating TWO cards at once, because the images were so cute that I couldn't do just one. I'm using the MFT Mice Day to Celebrate stamp set and of course, some patterned paper. All supplies will be linked in the description bar on YouTube beneath the video, which you can find HERE on my channel. I hope you enjoy it!

Friday, July 5, 2024

Capybara Collage Card


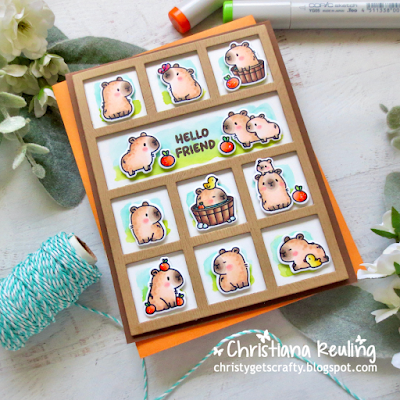
Hey friends, it's Christy with a fun collage card using the Mama Elephant Little Capybara Agenda stamp set. These critters are so incredibly cute and there are so many to choose from. I  stamped them out in Lawn Fawn Jet Black Ink on Spectrum Noir Ultra Smooth White Cardstock, colored them with Copic markers, and trimmed them out with the matching dies.


For the background, I took a sheet of Bristol Smooth Surface Cardstock and laid the MFT Verticle Collage Cover-up over top to use like a stencil. Then I did a quick watercolor background using Salvaged PatinaTwisted Citron, and Mowed Lawn Distress Oxide Ink. Once that was dry, I stamped my sentiment in Lawn Fawn Walnut Ink.

I cut the die from Light Brown Woodgrain Cardstock and popped it up over the background with foam tape, then glued the focal panel to a Chocolate Bar card base. I popped up my images as well, and finished with a bit of Stardust Stickles. If you'd like to see how the card came together, you can find the video tutorial on my YouTube channel HERE. Thanks so much for watching! I really hope you enjoy it!

Monday, July 1, 2024

Berry Grape Birthday Card - Lawn Fawnatics #176


Hey friends, it's time for another Lawn Fawnatics Challenge and this time we're having Fun with Food! I thought this was the perfect opportunity to use the new grape image from the Year Fourteen stamp set. I love a good pun, and while this one was great on it's own, I decided to take it to the next level by combining it with the strawberries from Berry Special.


After I colored the images with Copic markers and trimmed them out with the matching dies, it was time to work on the focal panel. I used the Outside In Stitched Rectangle Stackables to trim down a piece of Bristol Cardstock. Then I blended on Distress Oxide Inks in Worn Lipstick and Shaded Lilac. I did some splatter detail and adhered it to a Sugarplum card base.


Then I cut out a white Stitched Scalloped Rectangle Frame and trimmed down a striped piece of Rainbow Ever After 6x6 paper to fit behind. I also die cut the word "BERRY" from some Guava Cardstock using Finley's ABCs and stamped the rest of the phrase on an Everyday Sentiment Banner in Juice Box Ink. I finished the card with a few Clear Sequins and some Stardust Stickles.


If you'd like to see how this card came together, you can find the video tutorial HERE on my YouTube channel. Don't forget to stop by the Lawn Fawnatics Challenge blog and check out the card samples from the rest of the design team, and to link up your own Fun with Food projects to play along. Thanks so much for stopping by!

LinkWithin

Related Posts Plugin for WordPress, Blogger...